Understanding Object-Oriented Programming in JavaScript
One blueprint. Infinite heroes. That's what a class is.

Turning chai into code and ideas into full-stack applications. Sharing lessons from my development journey, one commit at a time.
Build Your Character — Object-Oriented Programming in JavaScript
One blueprint. Infinite heroes. That's what a class is.
What you'll learn in this blog:
What OOP is and why it exists
How a class is different from a plain object
How to write and read a constructor step by step
What
thisactually means and why it mattersHow to add methods and call them on instances
How to create multiple objects from one class
What encapsulation is and how private fields work
Common beginner mistakes and how to avoid them
A full mini-game you build line by line as you read
You're standing at a forge deep inside a dungeon.
On the anvil in front of you sits a glowing scroll. It describes a hero — every stat, every move, every ability. But it isn't a hero. It's the instructions for building one.
You pick it up and read the first line:
class Character { ... }
That's a class. And once you understand it, you can forge any hero you want — as many as you need — each one alive, independent, and ready for battle.
🗺️ Before you start: This blog assumes you know what a JavaScript object is (
{ name: "Aryan", age: 22 }), how functions work, and whatconstandletdo. If those feel shaky, read Episode 02 first. Everything here builds on top of them.
🪜 The Problem We're Solving First
Let's say you're building a small game. You need three heroes. Here's what most beginners do:
// The beginner approach — three separate objects, written by hand
const hero1 = {
  name: "Aragorn",
  hp:   200,
  role: "warrior",
  attack: function() {
    console.log(this.name + " swings a sword!");
  }
};

const hero2 = {
  name: "Lyra",
  hp:   140,
  role: "mage",
  attack: function() {
    console.log(this.name + " swings a sword!"); // copy-pasted
  }
};

const hero3 = {
  name: "Kira",
  hp:   160,
  role: "rogue",
  attack: function() {
    console.log(this.name + " swings a sword!"); // copy-pasted again
  }
};
You copy-pasted the attack function three times. Now imagine:
You need to fix a bug in
attack— you have to change it in three placesYou need 50 heroes — you write 50 objects by hand
A new hero type needs a
defendmethod — you add it 50 times
This is the exact problem OOP was invented to solve. Write the shape of a hero once. Stamp it out as many times as you need.
🧠 What is Object-Oriented Programming?
Before we touch any code, let's settle the concept.
Object-Oriented Programming (OOP) is a way of organising your code around things — objects that have properties and behaviours — rather than just writing one instruction after another.
Instead of asking "what steps should the program follow?" — OOP asks "what things exist in this world, and what can they do?"
The real world already works this way:
A car has properties (colour, speed, fuel) and behaviours (accelerate, brake, honk)
A bank account has properties (balance, owner) and behaviours (deposit, withdraw)
A game character has properties (name, health, level) and behaviours (attack, defend, level up)
OOP lets you model these things directly in code.
Why does it matter?
Without OOP, if you wanted three heroes, you'd write three separate objects by hand:
const hero1 = { name: "Aragorn", hp: 200, role: "warrior" };
const hero2 = { name: "Lyra",    hp: 140, role: "mage"    };
const hero3 = { name: "Kira",    hp: 160, role: "rogue"   };
Manageable for three. Painful for thirty. And if you want all heroes to have an attack() method? You'd add it to every single object manually.
OOP's solution: write the recipe once. Use it forever.
📜 The Blueprint: What is a Class?
A class is a blueprint — a template that defines what properties and methods every object of that type will have.
It's not an object itself. It's the instructions for building objects.
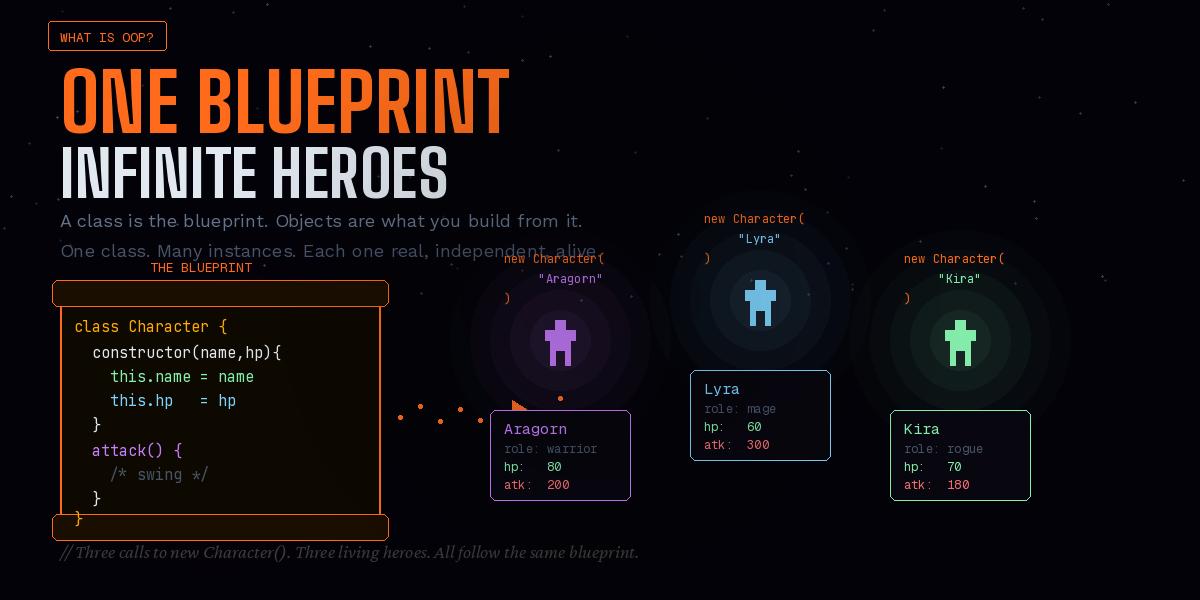
Think of it exactly like a character creation screen in an RPG:
The screen itself is the class
Each hero you create from it is an instance (an object)
Every hero follows the same template but has their own name, stats, and story
// The class — the blueprint
class Character {
  constructor(name, hp) {
    this.name = name;
    this.hp   = hp;
  }
}

// Three instances — three heroes, all from the same mould
const aragorn = new Character("Aragorn", 200);
const lyra    = new Character("Lyra",    140);
const kira    = new Character("Kira",    160);
Three calls to new. Three independent heroes. One class.
💡 Class = cookie cutter. Instance = cookie. You can make a hundred cookies from one cutter. Each cookie is real and separate — but they all came from the same shape.
The anatomy of a class — every part labelled
Before writing your first class, let's name every part so nothing surprises you:
class Character {           // 1. "class" keyword + class name (PascalCase by convention)
  //                        // 2. Opening brace — everything inside is the class body

  constructor(name, hp) {   // 3. The constructor method — always named "constructor"
    //         ↑     ↑      // 4. Parameters — what you pass when calling "new"
    this.name = name;       // 5. "this.name" — a property attached to this instance
    this.hp   = hp;         // 6. Another property
  }                         // 7. Constructor ends

  attack() {                // 8. A method — no "function" keyword needed inside class
    console.log("Strike!"); // 9. Method body
  }                         // 10. Method ends

}                           // 11. Class body ends

// Using it:
const hero = new Character("Aragorn", 200); // 12. "new" keyword + class name + arguments
//    ↑                                      // 13. The instance — stored in a variable
⚠️ Class names use PascalCase — first letter of each word capitalised.
Character,BankAccount,StudentProfile. Variable names use camelCase. This is a convention, not a rule — but every JavaScript developer follows it.
🔨 The Forge: class and constructor()
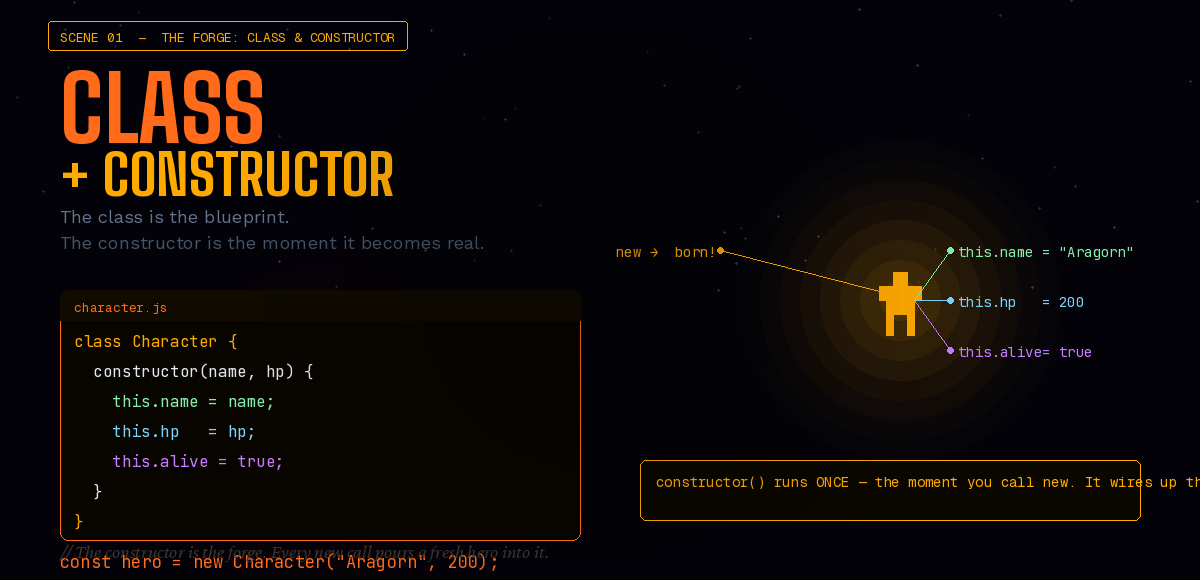
The constructor is the most important method in a class. It runs once, automatically, the moment you call new. Its job: take the arguments you pass in and wire them up to the object using this.
class Character {
  constructor(name, hp) {
    //         ↑     ↑
    //   arguments passed to new Character(...)

    this.name = name;  // attach name to THIS object
    this.hp   = hp;    // attach hp   to THIS object
  }
}
What is this?
this refers to the specific object being created right now. When you call new Character("Aragorn", 200), JavaScript creates a fresh empty object, runs the constructor with that object as this, and returns it to you.
const aragorn = new Character("Aragorn", 200);
// Inside constructor: this = the new aragorn object
// this.name → aragorn.name = "Aragorn"
// this.hp   → aragorn.hp   = 200

console.log(aragorn.name); // "Aragorn"
console.log(aragorn.hp);   // 200
Every time you call new, a brand new this is created. Aragorn's this is not Lyra's this. They are completely separate objects.
const aragorn = new Character("Aragorn", 200);
const lyra    = new Character("Lyra", 140);

aragorn.hp = 50;          // Aragorn takes a hit
console.log(lyra.hp);     // 140 — Lyra is fine. Separate objects.
💡
this= the current instance. It's how the class refers to itself. Withoutthis.name = name, thenamevariable would just disappear when the constructor finished.thismakes it stick.
What new actually does — step by step
Beginners often treat new as magic. Here's exactly what happens when you write new Character("Aragorn", 200):
// When you write this:
const aragorn = new Character("Aragorn", 200);

// JavaScript does this internally (simplified):
// Step 1 — Creates a brand new empty object: {}
// Step 2 — Sets its prototype to Character.prototype
// Step 3 — Runs the constructor with "this" = that new empty object
//           → this.name = "Aragorn"  (the empty object gets a "name" property)
//           → this.hp   = 200        (the empty object gets an "hp" property)
// Step 4 — Returns the now-populated object to you
// Step 5 — You store it in "aragorn"
After new finishes, aragorn looks exactly like this:
{
  name: "Aragorn",
  hp: 200
}
// Plus access to all methods defined in the class
What happens if you forget new?
// Common beginner mistake — forgetting "new"
const hero = Character("Aragorn", 200);
// TypeError: Cannot set properties of undefined
// Because "this" inside the constructor is now undefined (or globalThis in sloppy mode)

// Always use "new"
const hero = new Character("Aragorn", 200);
Always use new. JavaScript won't remind you — it'll just break in confusing ways.
Default property values in the constructor
Sometimes you want a property to always start at a fixed value regardless of what's passed in:
class Character {
  constructor(name, hp) {
    this.name  = name;
    this.hp    = hp;
    this.alive = true;   // always starts true — not a parameter
    this.level = 1;      // always starts at 1
    this.xp    = 0;      // always starts at 0
  }
}

const hero = new Character("Aragorn", 200);
console.log(hero.alive); // true  — set by constructor, not by caller
console.log(hero.level); // 1
console.log(hero.xp);    // 0
⚔️ The Battle: Methods
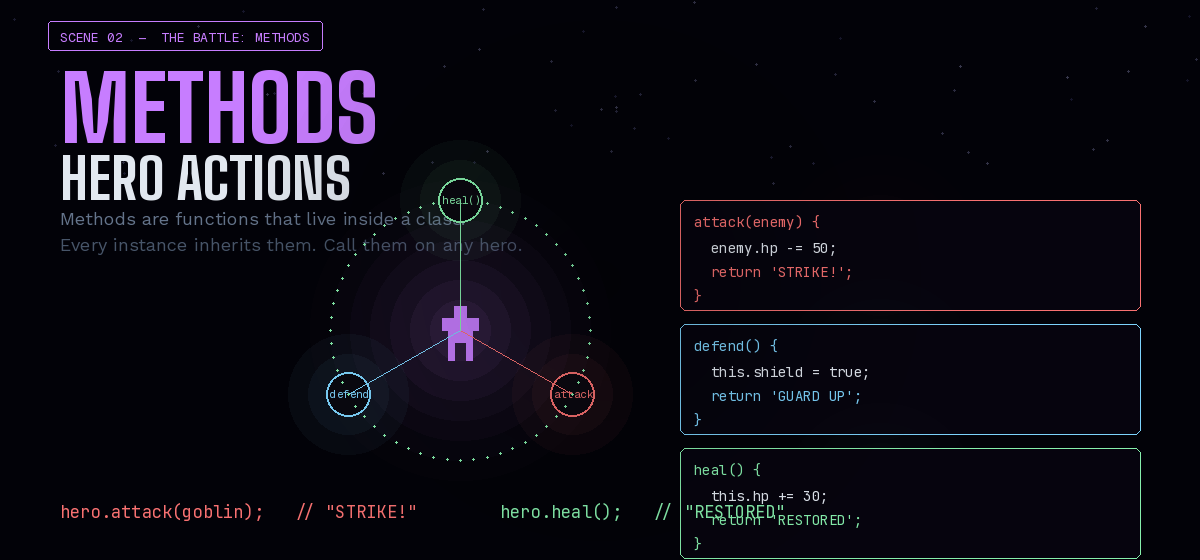
A hero that can't do anything is just a statue. Methods are the actions — functions that live inside a class and are available on every instance.
class Character {
  constructor(name, hp) {
    this.name = name;
    this.hp   = hp;
  }

  // Methods live directly inside the class — no "function" keyword needed
  attack(target) {
    target.hp -= 50;
    console.log(`\({this.name} attacks! \){target.name} has ${target.hp} HP left.`);
  }

  heal() {
    this.hp += 30;
    console.log(`\({this.name} heals! HP is now \){this.hp}.`);
  }

  status() {
    console.log(`\({this.name} | HP: \){this.hp}`);
  }
}
Every instance gets these methods automatically — you define them once, they're available everywhere:
const aragorn = new Character("Aragorn", 200);
const goblin  = new Character("Goblin",  80);

aragorn.attack(goblin);   // "Aragorn attacks! Goblin has 30 HP left."
aragorn.heal();            // "Aragorn heals! HP is now 230."
goblin.status();           // "Goblin | HP: 30"
Methods vs plain functions
Without a class, you'd need to write attack separately for every character — or pass the character as an argument every time. Methods eliminate that. They know which object they belong to through this.
// Without OOP — repetitive, fragile
function attack(attacker, target) {
  target.hp -= 50;
}
attack(aragorn, goblin);

// With OOP — clean, self-contained
aragorn.attack(goblin);
Methods can call other methods using this
This is something beginners often miss — methods can call each other inside the class using this.methodName():
class Character {
  constructor(name, hp) {
    this.name  = name;
    this.hp    = hp;
    this.alive = true;
  }

  takeDamage(amount) {
    this.hp -= amount;
    this.checkAlive(); // calling another method from inside a method
  }

  checkAlive() {       // this method is called by takeDamage — not directly by the user
    if (this.hp <= 0) {
      this.alive = false;
      console.log(`${this.name} has fallen.`);
    }
  }

  status() {
    const state = this.alive ? "alive" : "fallen";
    return `\({this.name} | HP: \){this.hp} | Status: ${state}`;
  }
}

const goblin = new Character("Goblin", 80);
goblin.takeDamage(90);      // internally calls checkAlive()
console.log(goblin.status()); // "Goblin | HP: -10 | Status: fallen"
Methods can return values
Not every method needs to console.log. Methods that return a value are more flexible — the caller decides what to do with the result:
class Character {
  constructor(name, hp) {
    this.name = name;
    this.hp   = hp;
  }

  // Returns a value — caller decides what to do with it
  isAlive() {
    return this.hp > 0;  // returns true or false
  }

  getStatus() {
    return `\({this.name}: \){this.hp} HP`;  // returns a string
  }
}

const hero = new Character("Aragorn", 200);

// Store the return value
const alive = hero.isAlive();
console.log(alive);           // true

// Use it in a condition
if (hero.isAlive()) {
  console.log("The battle continues!");
}

// Use it inline
console.log(hero.getStatus()); // "Aragorn: 200 HP"
🧑🤝🧑 Summoning: Creating Multiple Instances
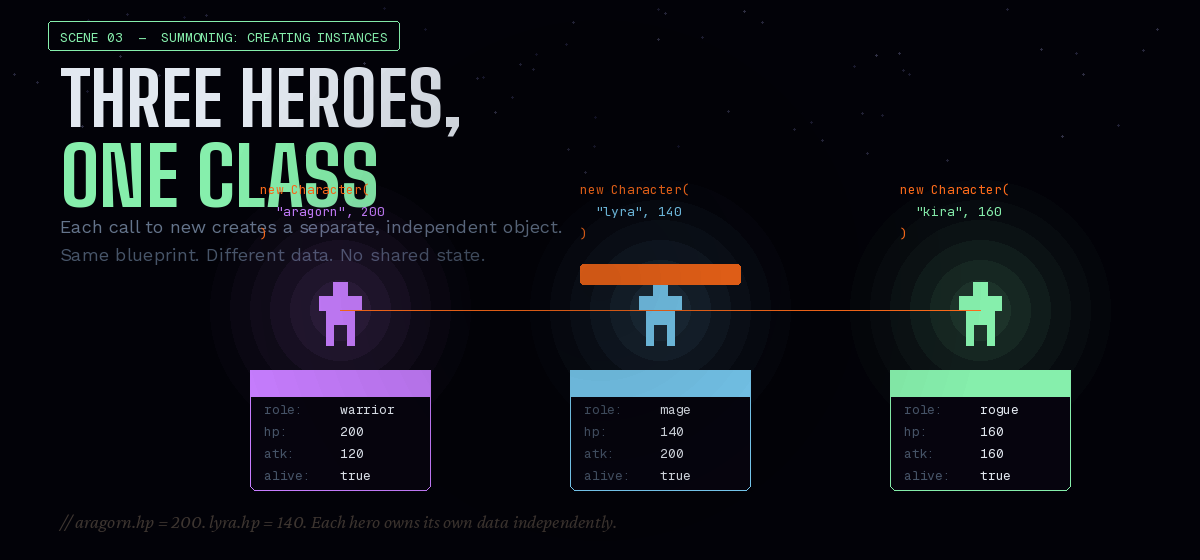
This is where the blueprint pays off. Write the class once. Summon as many instances as you need.
class Character {
  constructor(name, hp, role) {
    this.name  = name;
    this.hp    = hp;
    this.role  = role;
    this.alive = true;
  }

  attack(target) {
    target.hp -= 50;
  }

  introduce() {
    return `I am \({this.name}, a \){this.role} with ${this.hp} HP.`;
  }
}

// Summon three heroes from one class
const aragorn = new Character("Aragorn", 200, "warrior");
const lyra    = new Character("Lyra",    140, "mage");
const kira    = new Character("Kira",    160, "rogue");

// Each has the same methods — but their own data
console.log(aragorn.introduce()); // "I am Aragorn, a warrior with 200 HP."
console.log(lyra.introduce());    // "I am Lyra, a mage with 140 HP."

// Changing one doesn't affect the others
aragorn.hp = 50;
console.log(lyra.hp); // 140 — untouched
Code reusability — the whole point
Notice what you didn't write:
You didn't define
introduce()three separate timesYou didn't manually copy the same structure three times
You didn't worry about inconsistency between heroes
This is code reusability — OOP's biggest selling point. The more objects you need, the more this pays off.
Reading and updating properties directly
Even after an instance is created, you can read and change its public properties directly — just like you would with a plain object:
const aragorn = new Character("Aragorn", 200, "warrior");

// Read a property
console.log(aragorn.name);  // "Aragorn"
console.log(aragorn.hp);    // 200

// Update a property
aragorn.hp = 150;
console.log(aragorn.hp);    // 150 — updated

// Add a new property (public properties can be added after creation)
aragorn.weapon = "Excalibur";
console.log(aragorn.weapon); // "Excalibur"
Checking what something is — instanceof and typeof
Two tools beginners often need but aren't told about:
const aragorn = new Character("Aragorn", 200, "warrior");

// instanceof — is this object an instance of a particular class?
console.log(aragorn instanceof Character); // true
console.log(aragorn instanceof Array);     // false

// typeof — what type of value is this?
console.log(typeof aragorn);              // "object" — all class instances are objects
console.log(typeof aragorn.name);         // "string"
console.log(typeof aragorn.hp);           // "number"
console.log(typeof aragorn.introduce);    // "function" — methods are functions
instanceof is useful when you have mixed data and need to confirm what you're working with before calling methods on it.
Storing instances in an array
In real apps you'll rarely make just three heroes. You'll make a list:
// Create a party of heroes
const party = [
  new Character("Aragorn", 200, "warrior"),
  new Character("Lyra",    140, "mage"),
  new Character("Kira",    160, "rogue"),
];

// Loop and call methods on each
party.forEach(hero => {
  console.log(hero.introduce());
});
// "I am Aragorn, a warrior with 200 HP."
// "I am Lyra, a mage with 140 HP."
// "I am Kira, a rogue with 160 HP."

// Find a hero by name
const mage = party.find(h => h.role === "mage");
console.log(mage.name); // "Lyra"

// Heal every hero
party.forEach(hero => hero.heal(30));
This is OOP + array methods working together — one of the most common patterns in JavaScript.
🔒 The Vault: Encapsulation
Your hero has HP. What if something outside your class reaches in and sets it to a billion? Or -999?
const hero = new Character("Aragorn", 200);
hero.hp = 9999999; // anyone can just... do this
That's dangerous. Real characters should have controlled access — you can read HP through a method, but you can't smash it directly from outside.
Encapsulation means keeping an object's internal data protected and only exposing what needs to be exposed.
JavaScript uses # to mark fields as private — they're completely invisible and unreachable from outside the class:
class Character {
  #hp;  // private field — nothing outside can touch this

  constructor(name, hp) {
    this.name = name;
    this.#hp  = hp;   // set it inside the class — OK
  }

  // Controlled access — the only way to read hp
  getHp() {
    return this.#hp;
  }

  // Controlled mutation — the only way to change hp
  takeDamage(amount) {
    if (amount > 0) {
      this.#hp -= amount;
    }
  }

  heal(amount) {
    this.#hp = Math.min(this.#hp + amount, 200); // can't exceed 200
  }
}

const hero = new Character("Aragorn", 200);

// Correct — use the methods
hero.takeDamage(50);
console.log(hero.getHp());  // 150

// Blocked — private field can't be accessed
hero.#hp = 9999;            // SyntaxError
console.log(hero.#hp);      // SyntaxError
💡 Encapsulation = trust boundaries. You give the outside world just enough access to do what they need — no more. The
#field is the force shield. Methods are the controlled gates.
Public vs Private — the full picture
Here's how to decide what should be public and what should be private:
Public (this.name) |
Private (#hp) |
|
|---|---|---|
| Accessible from outside? | Yes | No |
| Can be read directly? | hero.name |
hero.#hp → error |
| Can be changed directly? | hero.name = "x" |
hero.#hp = 0 → error |
| When to use | Labels, IDs, display names | Sensitive state that needs validation |
class Character {
  #hp;           // private — needs validation before changing
  #maxHp;        // private — should never change after creation

  constructor(name, hp) {
    this.name = name;   // public  — fine to read/change freely
    this.role = "hero"; // public  — no danger in changing this
    this.#hp    = hp;
    this.#maxHp = hp;   // store the max so heal() can't exceed it
  }

  // Controlled ways to interact with #hp
  takeDamage(amount) {
    if (typeof amount !== "number" || amount < 0) return; // guard clause
    this.#hp = Math.max(0, this.#hp - amount);
  }

  heal(amount) {
    this.#hp = Math.min(this.#maxHp, this.#hp + amount); // can't exceed max
  }

  getHp()    { return this.#hp; }
  getMaxHp() { return this.#maxHp; }

  getHpBar() {
    const pct  = Math.round((this.#hp / this.#maxHp) * 10);
    const bar  = "█".repeat(pct) + "░".repeat(10 - pct);
    return `\({this.name}: [\){bar}] \({this.#hp}/\){this.#maxHp}`;
  }
}

const hero = new Character("Aragorn", 200);
hero.takeDamage(80);
console.log(hero.getHpBar()); // "Aragorn: [██████░░░░] 120/200"
hero.heal(50);
console.log(hero.getHpBar()); // "Aragorn: [████████░░] 170/200"
hero.takeDamage(999);
console.log(hero.getHp());    // 0 — floor is 0, not negative
Using get and set — JavaScript getters and setters
JavaScript has a cleaner syntax for controlled property access called getters and setters. They let you access a method like a property (no parentheses):
class Character {
  #hp;

  constructor(name, hp) {
    this.name = name;
    this.#hp  = hp;
  }

  // getter — accessed as hero.hp, not hero.hp()
  get hp() {
    return this.#hp;
  }

  // setter — triggered when you write hero.hp = value
  set hp(value) {
    if (value < 0) {
      this.#hp = 0;
    } else if (value > 200) {
      this.#hp = 200;
    } else {
      this.#hp = value;
    }
  }
}

const hero = new Character("Aragorn", 200);

// Reads like a property — but runs the getter function
console.log(hero.hp); // 200

// Writes like a property — but runs the setter function (with validation!)
hero.hp = 150;
console.log(hero.hp); // 150

hero.hp = -50;        // triggers setter
console.log(hero.hp); // 0 — negative clamped to 0

hero.hp = 9999;       // triggers setter
console.log(hero.hp); // 200 — max clamped to 200
💡 Getters and setters look like properties but run code. They're ideal when you want simple
hero.hpsyntax on the outside but validation logic on the inside. It's the best of both worlds.
🚨 Common Beginner Mistakes — and How to Avoid Them
These are the exact errors every beginner hits. Read them now, avoid them later.
Mistake 1 — Commas between methods (the JSON reflex)
Beginners who just learned objects instinctively add commas between methods. Don't.
// WRONG — no commas between class methods
class Character {
  constructor(name) {
    this.name = name;
  },                      // ← SyntaxError! No comma here
  attack() {
    console.log("strike");
  },                      // ← SyntaxError!
  heal() {
    console.log("heal");
  }
}

// CORRECT — no commas, just methods one after another
class Character {
  constructor(name) {
    this.name = name;
  }
  attack() {
    console.log("strike");
  }
  heal() {
    console.log("heal");
  }
}
Mistake 2 — Forgetting this inside methods
Inside a method, you must use this to access the instance's own properties. Bare variable names won't work.
class Character {
  constructor(name, hp) {
    this.name = name;
    this.hp   = hp;
  }

  // WRONG — "name" and "hp" are not in scope here
  status() {
    return `\({name} has \){hp} HP`; // ReferenceError: name is not defined
  }

  // CORRECT — always use this.name and this.hp
  status() {
    return `\({this.name} has \){this.hp} HP`;
  }
}
Mistake 3 — Using function keyword inside a class
Methods inside a class don't use the function keyword. That syntax is for standalone functions.
// WRONG — "function" keyword inside class body
class Character {
  constructor(name) { this.name = name; }
  function attack() {   // ← SyntaxError
    console.log("hit");
  }
}

// CORRECT — just the method name and ()
class Character {
  constructor(name) { this.name = name; }
  attack() {
    console.log("hit");
  }
}
Mistake 4 — Calling a method without parentheses
A method without () gives you the function itself, not the result of calling it.
const hero = new Character("Aragorn", 200);

console.log(hero.status);    // [Function: status] — you got the function, not its result
console.log(hero.status());  // "Aragorn: 200 HP" — called correctly
Mistake 5 — Expecting methods to share data between instances
Each instance has its own copy of properties. Methods run in the context of the instance they're called on.
const aragorn = new Character("Aragorn", 200);
const lyra    = new Character("Lyra", 140);

aragorn.hp = 50;

// This only changed aragorn's hp — not lyra's
console.log(aragorn.hp); // 50
console.log(lyra.hp);    // 140 ← completely separate
⚔️ Mini-Game — Build It As You Read
Let's build a tiny two-hero battle sim step by step. Run each block in your browser console to see it come alive.
Step 1 — Forge the hero class:
class Hero {
  #hp;
  #maxHp;

  constructor(name, hp, power) {
    this.name   = name;
    this.power  = power;
    this.#hp    = hp;
    this.#maxHp = hp;
    this.alive  = true;
  }

  get hp() { return this.#hp; }

  takeDamage(amount) {
    this.#hp = Math.max(0, this.#hp - amount);
    if (this.#hp === 0) {
      this.alive = false;
    }
  }

  heal(amount) {
    this.#hp = Math.min(this.#maxHp, this.#hp + amount);
  }

  getHpBar() {
    const filled = Math.round((this.#hp / this.#maxHp) * 10);
    return "█".repeat(filled) + "░".repeat(10 - filled);
  }

  status() {
    return `\({this.name.padEnd(10)} [\){this.getHpBar()}] \({this.#hp}/\){this.#maxHp}`;
  }
}
Step 2 — Add an attack method:
class Hero {
  #hp;
  #maxHp;

  constructor(name, hp, power) {
    this.name   = name;
    this.power  = power;
    this.#hp    = hp;
    this.#maxHp = hp;
    this.alive  = true;
  }

  get hp() { return this.#hp; }

  attack(target) {
    if (!this.alive) {
      console.log(`${this.name} is fallen and cannot attack.`);
      return;
    }
    const dmg = Math.floor(Math.random() * this.power) + 1;
    target.takeDamage(dmg);
    console.log(`\({this.name} hits \){target.name} for \({dmg} dmg!  \){target.status()}`);
  }

  takeDamage(amount) {
    this.#hp = Math.max(0, this.#hp - amount);
    if (this.#hp === 0) this.alive = false;
  }

  heal(amount) {
    this.#hp = Math.min(this.#maxHp, this.#hp + amount);
  }

  getHpBar() {
    const filled = Math.round((this.#hp / this.#maxHp) * 10);
    return "█".repeat(filled) + "░".repeat(10 - filled);
  }

  status() {
    const filled = Math.round((this.#hp / this.#maxHp) * 10);
    const bar    = "█".repeat(filled) + "░".repeat(10 - filled);
    return `\({this.name.padEnd(10)} [\){bar}] \({this.#hp}/\){this.#maxHp}`;
  }
}
Step 3 — Summon heroes and run the battle:
const aragorn = new Hero("Aragorn", 100, 25);
const goblin  = new Hero("Goblin",   60, 15);

console.log("⚔️  BATTLE START");
console.log(aragorn.status());
console.log(goblin.status());
console.log("─".repeat(40));

let round = 1;
while (aragorn.alive && goblin.alive) {
  console.log(`\nRound ${round}`);
  aragorn.attack(goblin);
  if (goblin.alive) goblin.attack(aragorn);
  round++;
}

console.log("\n🏆 BATTLE OVER");
if (aragorn.alive) console.log("Aragorn wins!");
else               console.log("Goblin wins!");
Expected output (randomized damage, so yours will differ):
⚔️  BATTLE START
Aragorn    [██████████] 100/100
Goblin     [██████████] 60/60
────────────────────────────────────────

Round 1
Aragorn hits Goblin for 18 dmg!   Goblin     [███████░░░] 42/60
Goblin hits Aragorn for 11 dmg!   Aragorn    [█████████░] 89/100

Round 2
Aragorn hits Goblin for 22 dmg!   Goblin     [████░░░░░░] 20/60
Goblin hits Aragorn for 9 dmg!    Aragorn    [████████░░] 80/100
...

🏆 BATTLE OVER
Aragorn wins!
You just built a working battle game using a single class. Every concept in this blog — constructor, this, methods, private fields, encapsulation — is in that code.
Here's the complete Character class with everything covered — annotated so every line connects back to a concept:
class Character {
  #hp;                                   // ← private field (encapsulation)

  constructor(name, hp, role) {          // ← constructor (runs on new)
    this.name  = name;                   // ← this = the instance
    this.role  = role;
    this.#hp   = hp;
    this.alive = true;
  }

  attack(target) {                       // ← method (shared by all instances)
    if (!this.alive) return;
    target.takeDamage(50);
    console.log(`\({this.name} attacks \){target.name}!`);
  }

  takeDamage(amount) {
    this.#hp -= amount;
    if (this.#hp <= 0) {
      this.#hp   = 0;
      this.alive = false;
      console.log(`${this.name} has fallen.`);
    }
  }

  heal(amount) {
    this.#hp = Math.min(this.#hp + amount, 200);
  }

  getHp() { return this.#hp; }          // ← getter (controlled access)

  status() {
    return `\({this.name} [\){this.role}] HP: ${this.getHp()}`;
  }
}

// ── Summoning heroes ──
const aragorn = new Character("Aragorn", 200, "warrior");
const goblin  = new Character("Goblin",   80, "enemy");

console.log(aragorn.status()); // "Aragorn [warrior] HP: 200"
aragorn.attack(goblin);        // "Aragorn attacks Goblin!"
console.log(goblin.status());  // "Goblin [enemy] HP: 30"
aragorn.attack(goblin);        // "Goblin has fallen."
🔄 Class vs Plain Object — When to Use What
Now that you know both, here's when to reach for each:
| Situation | Use | Why |
|---|---|---|
One-off config ({ debug: true }) |
Plain object | Simpler, no overhead |
Describing one thing once ({ name, age }) |
Plain object | No need for a blueprint |
| Creating many similar items | Class | Blueprint pays off |
| Items need shared methods | Class | Define once, use everywhere |
| Data needs validation / protection | Class | Private fields + setters |
You need instanceof checks |
Class | Works with instanceof |
// Plain object — fine for a one-off config
const settings = { theme: "dark", language: "en", fontSize: 16 };

// Class — better when you make many, or need methods + validation
class UserProfile {
  constructor(username, email) {
    this.username = username;
    this.email    = email;
    this.joinedAt = new Date();
  }
  getDisplayName() {
    return `@${this.username}`;
  }
}
const user1 = new UserProfile("aryan_dev", "aryan@example.com");
const user2 = new UserProfile("priya_codes", "priya@example.com");
class           →  the blueprint / template
constructor()   →  runs on "new" — wires up this
this            →  refers to the current instance
new ClassName() →  creates a new instance from the class
methods         →  functions inside the class — every instance gets them
field           →  private — can't be accessed from outside
encapsulation   →  hiding internal state, exposing only what's needed
| Concept | What it means | Code |
|---|---|---|
| Class | Blueprint for objects | class Character {} |
| Instance | One object made from the class | new Character("A", 200) |
| Constructor | Runs once on creation | constructor(name) { this.name = name } |
this |
The current instance | this.hp = hp |
| Method | Function inside the class | attack() { ... } |
| Private field | Hidden internal data | #hp |
| Encapsulation | Controlled access to data | getHp() { return this.#hp } |
🏋️ Today's Assignment
Open your browser console. Forge your first class.
// Step 1 — Create a Student class
class Student {
  constructor(name, age, course) {
    this.name   = name;
    this.age    = age;
    this.course = course;
  }

  introduce() {
    return `Hi! I'm \({this.name}, \){this.age} years old, studying ${this.course}.`;
  }

  study(topic) {
    console.log(`\({this.name} is studying \){topic}. 📚`);
  }
}

// Step 2 — Create multiple students
const aryan = new Student("Aryan", 22, "JavaScript");
const priya = new Student("Priya", 20, "Python");
const dev   = new Student("Dev",   23, "React");

// Step 3 — Call methods on each
console.log(aryan.introduce()); // "Hi! I'm Aryan, 22 years old..."
console.log(priya.introduce());
aryan.study("OOP");

// Step 4 — Verify independence
aryan.age = 23;
console.log(priya.age); // 20 — unaffected

// Step 5 — Bonus: add a private grade field
class StudentV2 {
  #grade = 0;

  constructor(name) {
    this.name = name;
  }

  setGrade(g) {
    if (g >= 0 && g <= 100) this.#grade = g;
  }

  getGrade() {
    return this.#grade;
  }
}

const student = new StudentV2("Aryan");
student.setGrade(92);
console.log(student.getGrade()); // 92
console.log(student.#grade);     // SyntaxError — private!
🔑 Key Takeaways
A class is a blueprint — not an object itself, but the template for creating objects
The constructor runs automatically on
new— it wires upthiswith the object's initial datathisrefers to the specific instance being created or used — each instance has its ownthisMethods are functions inside the class — defined once, available on every instance
new ClassName()creates a fresh, independent instancePrivate fields (
#) enforce encapsulation — they can't be read or changed from outsideEncapsulation protects data integrity — expose only what needs to be exposed
Getters/setters (
get/set) let you control reads and writes like properties but with logic insideinstanceofchecks which class an object was created fromInstances can be stored in arrays and combined with array methods (
forEach,find,filter)Commas between methods → SyntaxError.
functionkeyword inside class → SyntaxError. These are the two most common class mistakes.
🎯 What's Next?
Episode 04: this, call, apply, bind — The Actor with Amnesia
Every time the actor walks onto a new stage, he forgets who he is. His agent carries three tools —
call,apply, andbind— to remind him. Each one works differently. All three solve the same problem:thishas gone missing.
We'll cover why this changes depending on context, and exactly how to control it.
Enjoyed this episode? Drop a reaction and share with a friend who's learning JavaScript. See you at Episode 04. ⚔️